

Directions
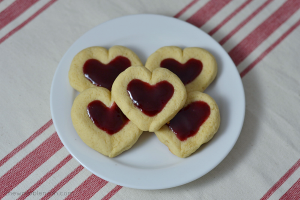
If you’re looking for a little something simple and sweet for your loves this Valentine’s Day, these little gems are the perfect thing. They are deceptively simple and, in all honesty, pretty darn cute. My girls were more than a little excited when they came home to find these waiting for them after school. Ah, the life of a food blogger…celebrating life’s holidays a little bit early, every time.
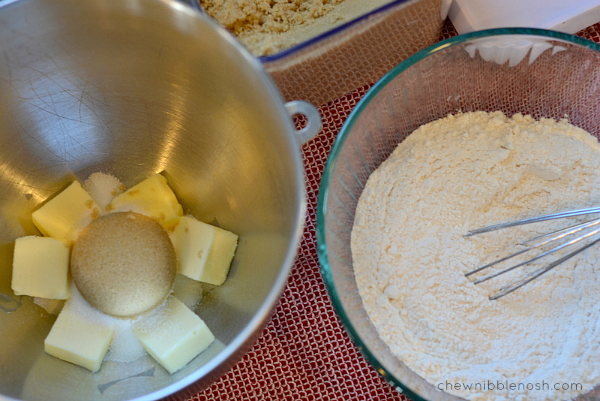
I started by gathering my ingredients, all of which I happened to have on hand already, which is always nice.
The usual cookie suspects: Butter and sugars in one bowl. Flour, baking powder and salt in the other.
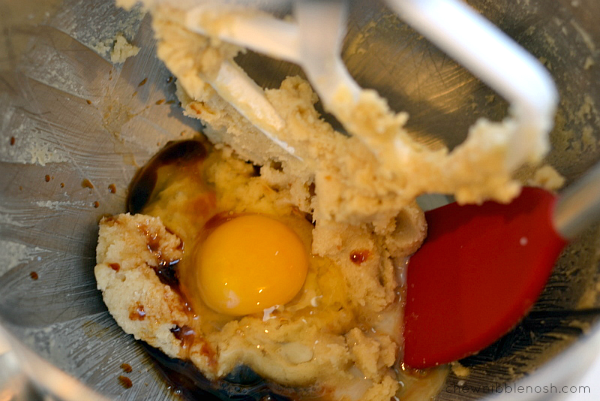
I beat the butter and sugars until creamy and then added in my egg, some vanilla and a dab of milk.
In the grand scheme of cookie doughs, it doesn’t look like it makes too much, but you’ll get almost three dozen hearts from one batch. A little goes a long way.
Once the egg and friends were mixed in, I added my dry ingredients and blended until they were combined. Then, it was time to make my hearts.
I rolled pairs of two small 3/4 inch balls and set them next to each other on the cookie sheet. Then, I pressed my thumbs into them to create the indentations on each side, and pressed them into heart shapes.
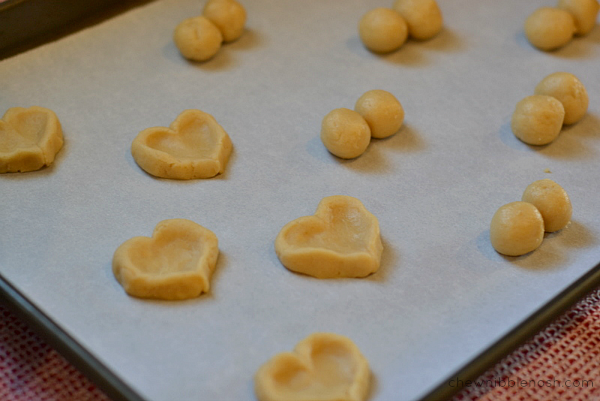
It’s a little more than just thumbprinting it. I had to press each heart into place and mold them into shape, but it didn’t take long once I got the hang of it. Molding it using two balls of cookie dough helps make sure the sides of the hearts are nice and symmetrical.
Once they were all set, I popped them into the oven for a few minutes. As soon as they came out, I pressed the indentations back into the cookies, as they’d puffed up a little bit, and then while the cookies were still quite warm, I gently spooned a little bit of seedless raspberry jam into each cookie.
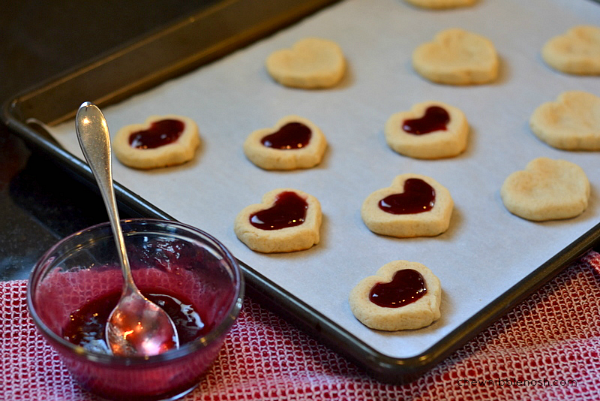
The seedless jam worked perfectly, as there weren’t any chunks of fruit or seeds to get in the way. I just stirred the jam up so it was nice and fluid before dabbing a bit into each heart, right where I wanted it.
I moved the cookies to a cooling rack and let them cool and set up a bit. Because of the jam on the tops of these, you need to store them in a single layer.
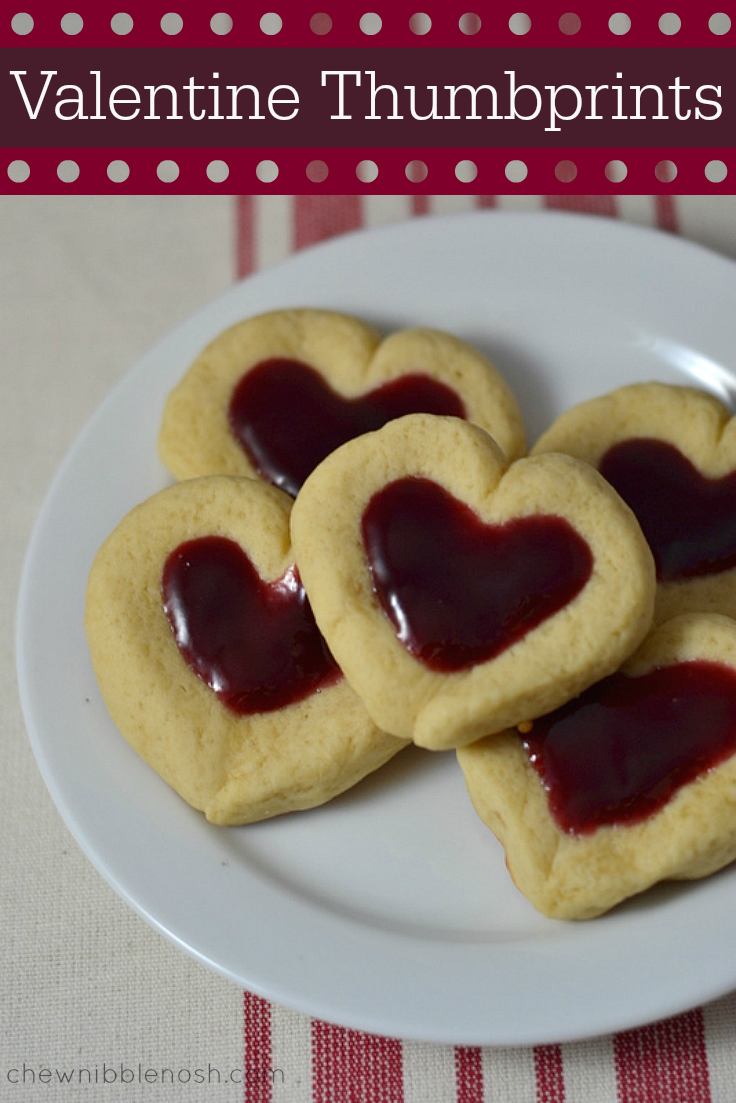
My little Valentines went absolutely nuts for these. The cookie is sweet and buttery, and you can’t go wrong with a dollop of raspberry jam! And they were simple enough that I can probably make sure they have some to munch on when it’s actually Valentine’s Day as well. In fact, I bet I know some little bakers with eager thumbs who would like to get in on the baking action.
VALENTINE HEART THUMBPRINT COOKIES
Adapted from Better Homes & Gardens
- 1/2 cup butter, softened
- 1/4 cup granulated sugar
- 1/4 cup packed brown sugar
- 2 cups all-purpose flour
- 1 tsp. baking powder
- 1/2 tsp. salt
- 1 egg
- 1 Tbsp. milk
- 1 tsp. pure vanilla extract
- 1/4-1/2 cup seedless raspberry jam
- Preheat your oven to 375*F. Line two cookie sheet with parchment paper and set aside.
- In a large mixing bowl, beat the butter and sugars until creamy. Stir together the flour, baking powder and salt in a separate medium-sized bowl.
- Scrape down the sides of the butter bowl, and add the egg, vanilla, and milk. Beat until creamy, about 1 minute.
- Gradually mix the dry ingredients into the butter mixture, mixing until just combined.
- Shape the dough into 3/4 inch balls, placing two balls of cookie dough next to each other for each heart cookie. Press your thumbs into the dough to create an indentation, and then shape the dough into hearts, making sure there’s a heart shaped indent in the middle of each cookie.
- Bake the cookies for 7-8 minutes at 375*, until bottoms are lightly golden and cookies are set.
- Upon removing from the oven, carefully re-press the indent into each cookie if it’s puffed up a bit.
- Stir the raspberry jam until it’s nice and smooth, and then gently add a little bit of jam to each cookie while they are still quite warm, filling the heart shaped middle.
- Move to a cooling rack and cool completely.
- Store in a single layer, in an airtight container.
- ENJOY!