

Directions

This summer was a summer of firsts for our family. We’d moved to a new place, so every day seemed like an adventure for a while, as we navigated our way through our new town. One of the things I was incredibly excited to find on our exploration was our amazing local farmers market. Actually, Indianapolis is lucky to be home to many amazing markets, but we frequented the Carmel Farmers Market, because it was close to home. What a great way to spend a Saturday morning! We love to grab a delicious, savory breakfast crepe (Avery prefers Nutella and Banana) or a “Walking Waffle”, and wander around the beautiful vendors booths, filling our bag with fresh baked pastries and breads, amazing produce, and so much more.
You can guarantee that one of the items that made it into our bag weekly were beautiful homegrown tomatoes. As you know, I can’t grow a thing, so I love when someone else can provide me with amazing summer tomatoes.
The Farmers Market is winding down for the year, only a couple of weekends left, so I wanted to make sure to send it off with a bang and make one of my favorite tomato tarts with some of those amazing market tomatoes before it was too late. It’s fairly simple to put together, and looks pretty impressive when all is said and done. The biscuit crust and cheesy topping are the perfect vehicle for summer’s bounty.
I start by mixing up a quick biscuit dough. I combined some flour, baking powder, sugar, baking soda and salt in a bowl, and then used my pastry blender to cut in some cubes of chilled butter. Flaky biscuits come from cold butter, so don’t let it come to room temperature first!
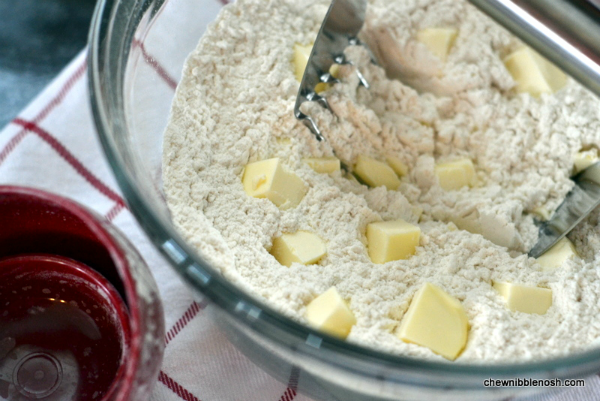
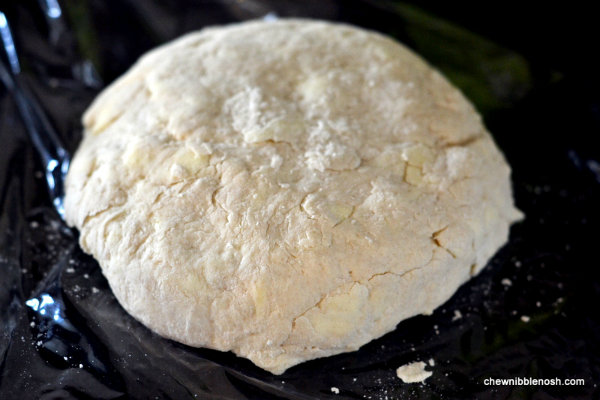
Once the mixture was coarse, with a few peas sized lumps of butter, I stirred in just a bit of buttermilk, to help bind the dough together. Once it was just mixed in, I removed the dough from the bowl, kneaded it a few times and patted it into a disk. I wrapped the disk in plastic wrap and let it hang out in the fridge while I got the rest of my ingredients together.
Next, it was time to get my filling ready. I sliced up some beautiful red and gold heirloom tomatoes into quarter-inch slices. Then, I mixed together some shredded Gruyère cheese, and a little bit of mayo, with some fresh chopped basil and oregano.

This would be the cheesy mixture I’d dot the top of my tart with.
When that was done, I got out a sheet of parchment paper, and dusted it with a bit of spelt flour. The original recipe calls for semolina flour, but I couldn’t find that at my grocery store, so I went with spelt, which is an equally nutty substitute. On the parchment, the flour helps to keep the dough from sticking. Once the dough is rolled out, a little more of the spelt flour was sprinkled over the dough to help soak up some of the tomato juices and keep the crust from getting soggy. If you can, try to use a “nuttier”, more earthy flour than just plain all-purpose. I have a feeling that plain white flour might taste pasty.
Anyway, I rolled out my dough into a 13-inch circle and sprinkled a couple of tablespoons of the spelt flour over the dough, leaving the edges flour free. Then, I layered on my beautiful tomato slices, sprinkling them with salt as I layered.
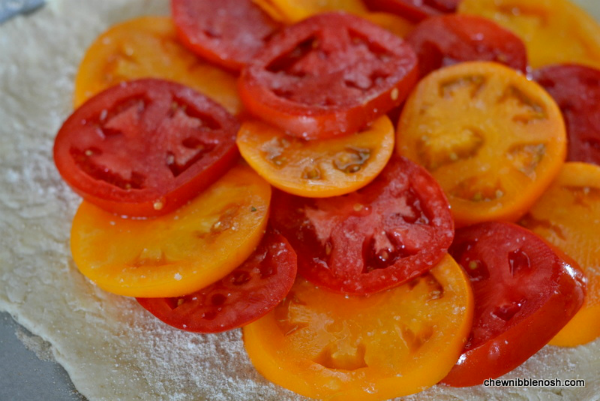
Then, I dotted the top with dollops of that wonderful cheese mixture. Once that was done, I folded the dough edges up over the edge of the tomatoes, crimping the dough together as I went. When I was done, I had a beautiful free-form tart, ready to pop in the oven.

The tart bakes for about 20-25 minutes, just long enough for the crust to brown up nicely, and for that cheese to bubble around a bit. When it was done, I removed it from the oven and let it sit for about thirty minutes before slicing into it.

The wait time is crucial. It allows everything to set up and soak back in the juices. Slice into it too early, and you’ll have a soupy mess. Thankfully, the tart tastes wonderful warm, and even at room temperature, if you want to make it way ahead of dinner time.
When it was time for dinner, we enjoyed the tart alongside some amazing Indiana sweetcorn, pulled from the Farmers market as well, and some grilled chicken and steaks that my own, personal Grill Master grilled up for us. It was a dinner made in summer heaven. Not too many of these left, as we move into fall, but I’ll take them while I can get them.
HEIRLOOM TOMATO AND CHEESE TART
Adapted from Fine Cooking
- For the Biscuit Dough:
- 1 3/4 cups all-purpose flour, plus a little more for dusting
- 2 tsp. baking powder
- 1 tsp. sugar
- 1/2 tsp. baking soda
- 1/2 tsp. table salt
- 6 Tbsp. cold, unsalted butter, cut into 1/2-inch pieces
- 3/4 cup cold, well shaken buttermilk (I used low-fat)
- For the Filling:
- 1/4 cup semolina or spelt flour
- 3-4 medium ripe tomatoes (about 1 1/2 lbs.), cored and sliced crosswise, 1/4-inch thick
- 2 oz. coarsely grated Gruyère cheese (about 2/3 cup, using the large holes of a box grater)
- 1/3 cup mayonnaise
- 1/4 cup finely chopped basil
- 1 tsp. finely chopped fresh oregano
- salt and pepper
- Position a rack in the middle of your oven, and preheat the oven to 425*F.
- Make the biscuit dough. In a large bowl, combine the flour, baking powder, sugar, baking soda and salt. Using a pastry blender, or your fingertips, cut in the butter until the mixture resembles a coarse meal with some pea sized lumps of butter. Using a silicone spatula, stir in the buttermilk, just until the flour mixture is moistened. (Do not overmix. The dough should just come together. It will be sticky.) Transfer the dough to a floured work surface and gently knead it 6-8 times, dusting with flour as needed. Pat into a disk and wrap in plastic wrap. Chill the dough until you’re ready to build the tart.
- Sprinkle a 12×17 inch sheet of parchment paper with 2 Tbsp. of the semolina/spelt flour. Pat the biscuit dough into a 5 inch round on the flour. Using a floured rolling pin, roll out the dough into a 13-inch round, lightly dusting with all-purpose flour as you roll to keep the dough from sticking.
- Transfer the dough on the parchment to a rimmed baking sheet.
- Sprinkle the remaining 2 Tbsp. of semolina/spelt flour over the dough, leaving a 1 1/2 inch border.
- Arrange the tomato slices over the dough in two flat, slightly overlapping concentric circles, sprinkling with salt as you go.
- Combine the cheese, mayonnaise, herbs and 1/8 tsp. pepper in a small bowl. Place dollops (generous tablespoons) of the cheese mixture over the tomatoes.
- Fold the edges of the dough up and over the edges of the tomatoes, crimping the dough as needed to keep it in place.
- Bake in the preheated oven for about 20-25 minutes, until the crust is golden brown, cheese is toasted, and the tomatoes are soft.
- Let the tart cool on a wire rack for about 30 minutes before slicing. Can be served at room temperature, as well.
- ENJOY!